Blog on a Log
Friday, November 26, 2021
Closed Black Friday - Volunteering Instead 4th Annual
Closed Black Friday Volunteering Instead
November 26, 2021
Four years ago we decided we hated the idea of Black Friday enough that we would just shut down the store for the day and shun all the Black Friday Deals.
But we did hope to make a bit of a point so we chose to do something more valuable with our time and instead took all of our staff in Winnipeg to the Main Street Project and the RFDA food bank in Thunder Bay to volunteer our time for the day for those in need.
When we first did this we actually got a lot of people talking and really loving the idea. Four years later - after pandemic shutdowns and major supply chain shortages some of our other friends in retail still tell us they love the idea but I can tell that they are really just thinking we are crazy. How can we shut down on a day like Black Friday when we've been through such a rollercoaster over the last couple of years and the forecast for 2022 is completely unknown?
I'll admit the thought did run through my mind that we could probably open and most people would never notice. Probably a few who have been our big supporters over the last few years would but the vast majority of people would never realize or remember that we'd ever been closed this day.
But we are a company of people who stand behind our core values and our beliefs. Four years ago we said we would not buy into the Black Friday hype and we would remain closed and continue to encourage other retail stores to join us. Not many have joined us.
The reality for us is that we are in the retail industry. We sell stuff. We have awesome outdoor gear on offer for all of our customers and it really is great quality product. We do well as a store when you come and support us and decide to purchase your outdoor gear from us. From time to time you will also find some great “deals” in in both our physical and online stores. But Black Friday is a day designed by marketing folks to sell more stuff just for the sake of selling more stuff.
We live in a world today where we really need to be conscious about what we purchase and how much we purchase. It's important to consider the quality and the quantity of what we buy. Our landfills are being filled with stuff that is barely used, broken and discarded. Our lives are cluttered by the many things we have in our households. Our finances are being tapped by the constant marketing to buy more. Manufacturing more and more stuff is putting immense strain on our planet and resources.
We do hope you choose to support our business and purchase your outdoor gear from us but there will always be another day to do so. We are open tomorrow but for today we are hoping you might spend some time thinking about how much you buy, what you buy and why you buy it. Do something nice for someone else and we look forward to seeing you tomorrow!
Rick Shone
Chief Adventure Officer!
Sunday, November 29, 2020
What If I Need to Be Evacuated by Helicopter?
What Happens if I Need a Helicopter Evacuation from the Backcountry?
Written by: Rick Shone
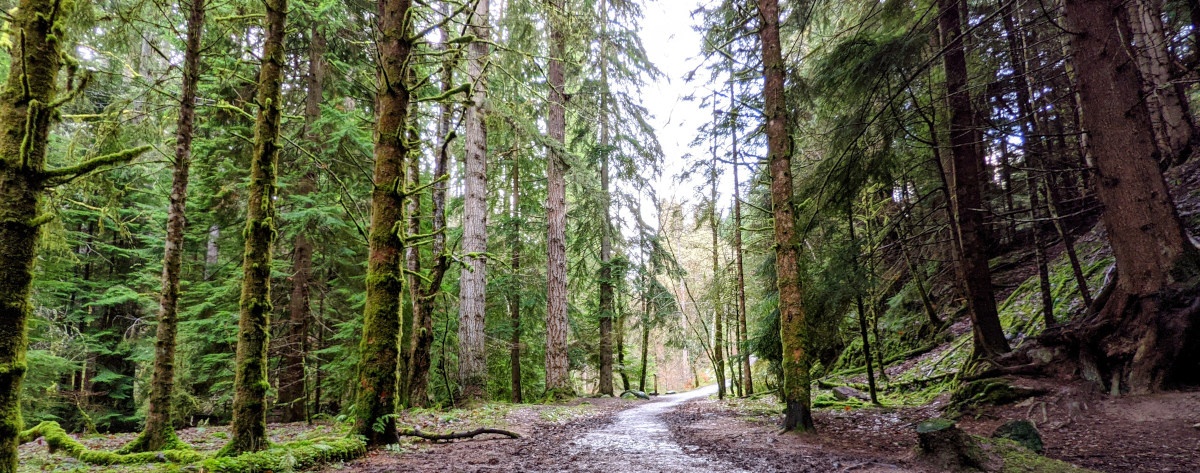
In 20 years of outfitting back country enthusiasts and over 14 years of planning remote style adventure races I have noted that back country emergencies are rather rare. Now that is not to say that injuries in the back country do not happen, but just that life threatening injuries that require the aid of EMS or air helicopter services are not that common. Why is that? It is because the wilderness can be a relatively safe place to be and the majority of outdoor enthusiasts are blessed with some degree of common sense and instinct to protect their own safety.
I have had a lot of people tell me over the years that I am a risk taker but I would disagree a little. I am actually pretty cautious compared to the average base jumper but my degree of risk tolerance is certainly not the same as others due to experience and a whole host of other reasons. The wilderness is a place you should feel inspired to run towards, not away from. But no one should venture into the back country without proper consideration of some of the risks involved. Planning and developing your wilderness skills is essential for your long term safety and enjoyment of the outdoors. Inevitably, the more time you spend in the back country you will feel the lure of exploring new areas, testing your limits, navigating off trails and the like. This is completely fine but without dedicated practice and learning, you are putting yourselves and others at unnecessary risk.
Despite your best planning and preparation, there is always the chance that something unforeseen can happen.
The first 3 things we recommend are:
1. Leave a Trip Plan
You should never head out into the back country without telling anyone where you are going and what time to expect you back. This is the simplest insurance you can offer yourself. Adventure Smart has a great website where you can create a digital trip plan to leave with someone at home. It is filled with a lot of other great safety tips as well you should take some time to review.
2. Bring a Personal Locator Device
There are many options available but three that we recommend considering are the Garmin InReach, the Spot X Messenger and the Spot Gen 4 device. Both the InReach and the X Messenger allow two-way messaging using satellite communications while the Spot Gen 4 is a simpler device that is a one-way communicator. Various service plans do apply to these devices but economical rental options are available at our store and other outfitters.
3. Bring a First Aid Kit
You should never leave home without it. Remember to restock the kit when you get home if you used anything from it during your trip. We recommend all outdoor enthusiasts commit themselves to taking at minimum a Standard First Aid course because carrying a first aid kit is somewhat useless if you have no idea how to use the items in it. There are some great advanced first aid options available through our stores and other outfitters that provide valuable knowledge for back country specific situations.
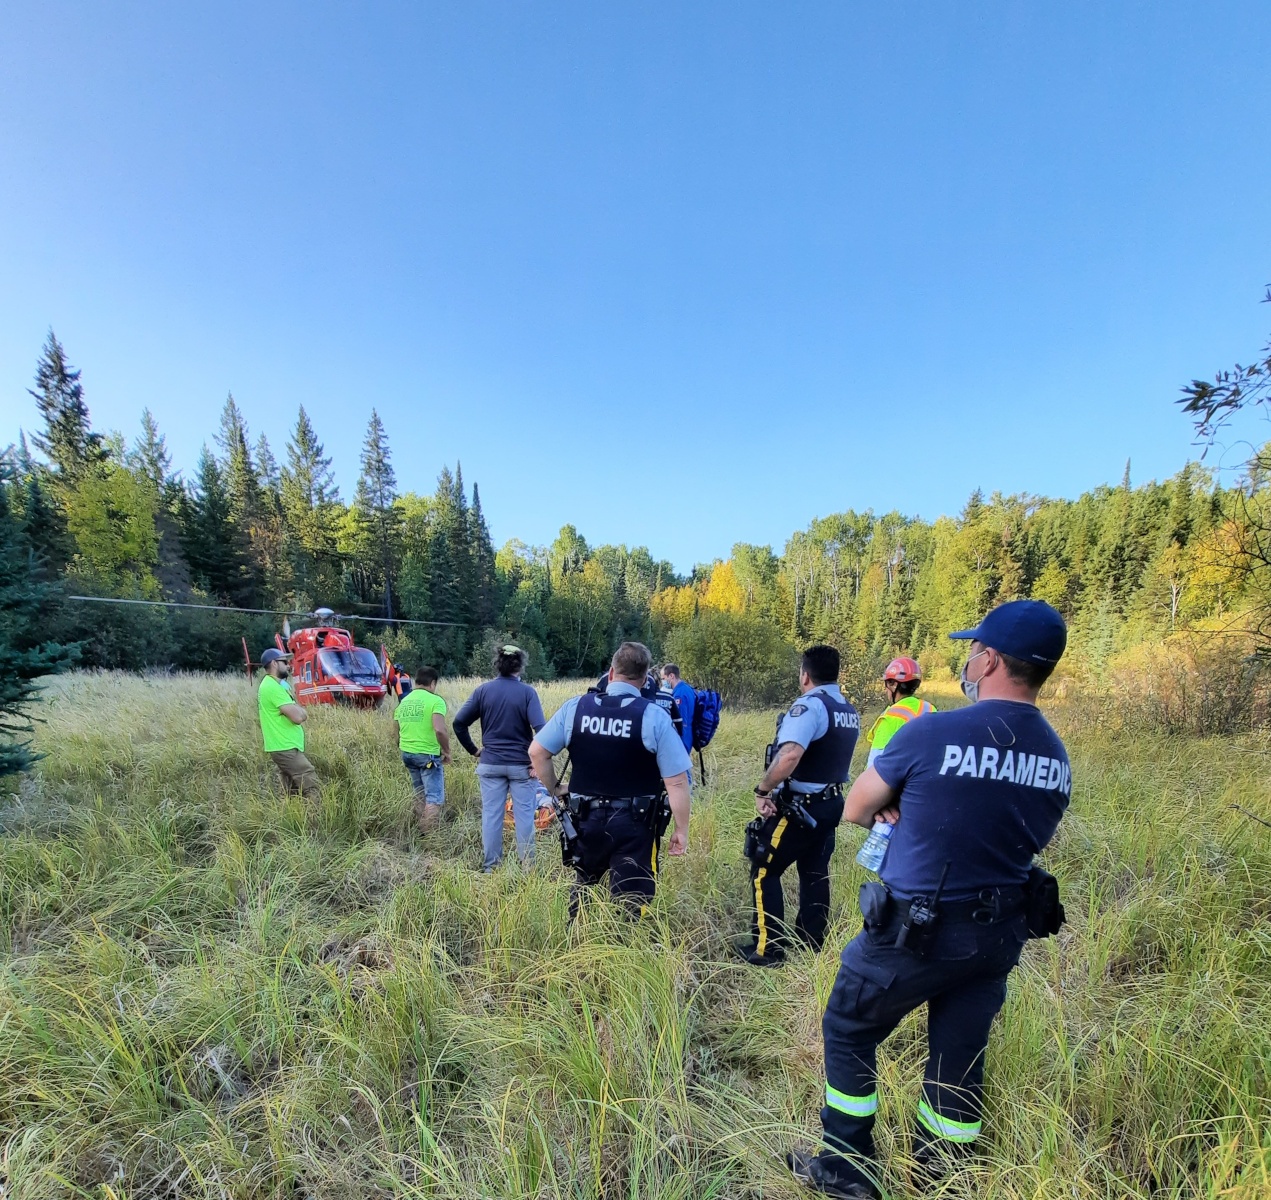
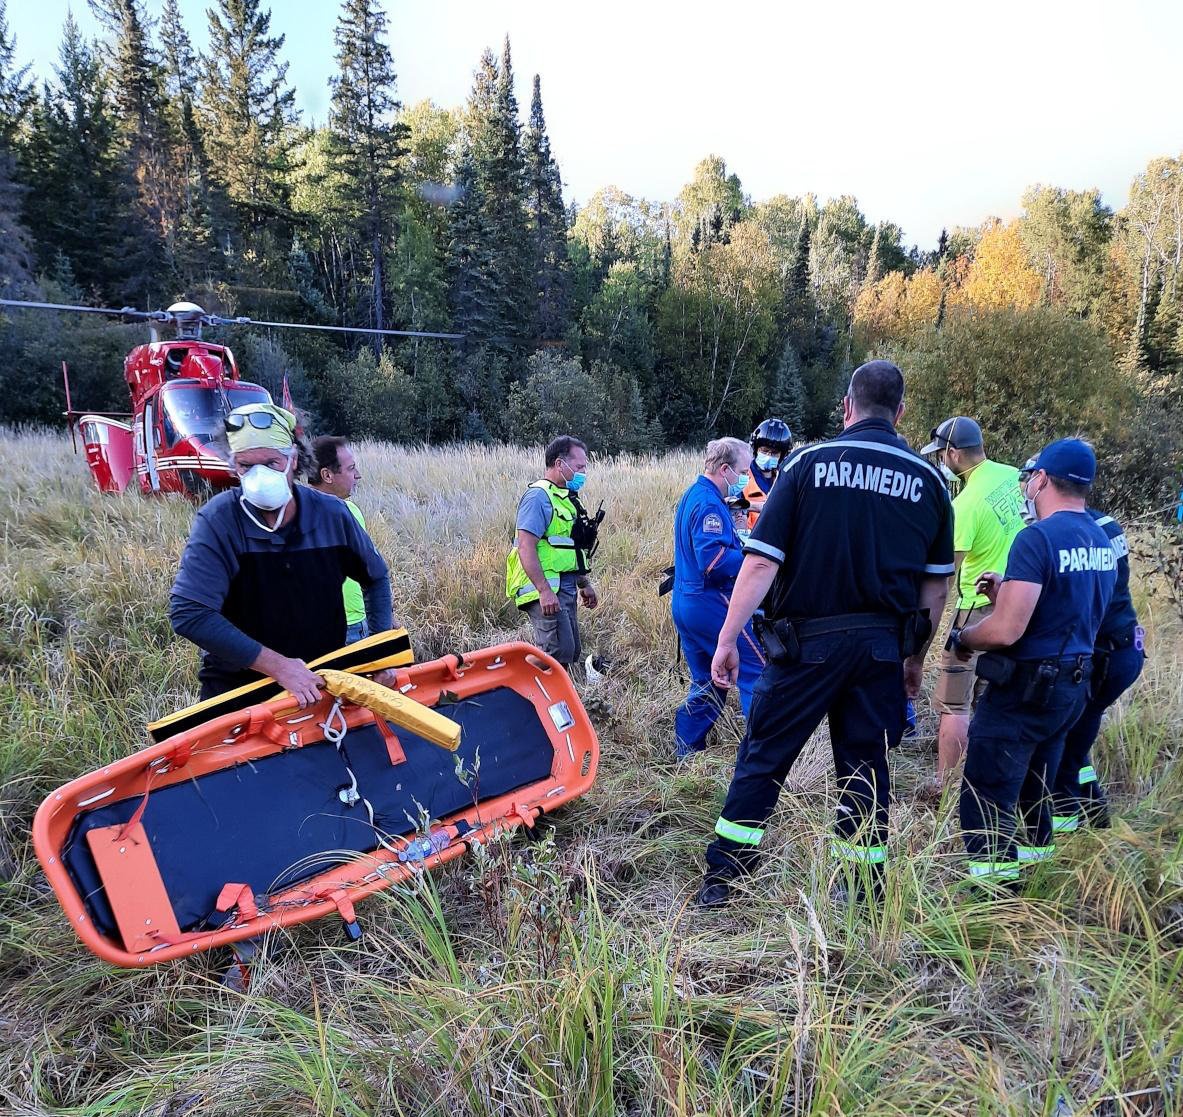
If you are injured in the backcountry you must have some idea of how to take care of yourself. In the extreme case you need to be extracted by helicopter, you are going to have to wait a long time and possibly figure out how to get yourself to an area more conducive for them to land.
This past September, our team was faced with an air medevac situation where an injured person broke their tib / fib while trekking through the back country. Only 500 m from the nearest road, the first responders attending scene decided that it was not possible to move the person to the road due to the terrain. As you can imagine, helicopters just do not arrive on command and in the blink of an eye but, in this case, nearly 3 hours later. I have heard many stories where response was much longer or not even possible due to the location of the injured person. It goes without saying that being evacuated by a helicopter is just not a position you ever hope to be in.
Who Pays for the Flight?
This is one of the most popular questions I hear. The answer to this differs depending on the province that you are located in or what organization is picking you up. If you are being evacuated by Search and Rescue, there likely will be no fee incurred. We do live in a great country. In most cases, your flight will either be completely covered or the vast majority of the cost will be covered IF you are in the province you reside in AND possess a current health card. Manitobans will not incur a charge for air evacuation however residents of Ontario will be charged a very nominal co-payment fee of $45.00.
That is a big IF that most people do not consider. This recent CBC article shares the experience of an Ontario woman who was faced with an air ambulance bill of $12,000 while out of her home province in Nova Scotia. The STARS website suggests that a typical flight would cost $5,400. An article in the Washington Post puts flights in the US at around $39,000 USD.
if you are traveling out of province, or you are simply wandering across provincial boundaries in the middle of your day it is highly recommended that you acquire travel insurance that covers you for helicopter evacuation and repatriation to your home province. Costs and insurance policies are subject to change and worth reviewing often.
Check your insurance! Whether you are traveling in Canada or around the world - know your coverage. Medi-Quote has designed a page on their website just for our wilderness adventurers. Contact them for travel insurance and any questions you might have to make sure you are fully covered! (We get nothing out of this other than the comfort in knowing you will prepare properly and we get to support a professional Canadian business by sending you to them).
Wikipedia list of Air Ambulance services in Canada.

Last Updated: December 12, 2020
Friday, November 13, 2020
How to Shit in the Woods
Posted: November 13, 2020
Written by: Rick Shone
I never thought I would be writing an article instructing people how to shit in the bush but here I am. Covid 19 has been the motivator that everyone has needed to get outside this year and enjoy the trails an back country canoe routes. I have never seen so many people out there enjoying nature! It is amazing but I have never seen so much shit all over the place either.
With a little research, I even found that someone had written a 138 page book on how to do just this! It is also called “How to Shit in the Woods” so apparently this is a popular topic with lots to talk about. The book covers pooping in just about every form, fashion and environment out there and you should check it out.
But really - it is not that hard and nobody wants to step in your shit or see your toilet paper strewn all over. Those who travel with dogs will also be thankful not to have their pup crawl into the tent smelling like human excrement.
What you need to know in a few simple, easy steps:
1. Pick Your Zone
When traveling with a group, it's always good to discuss where your "zone" will be for the stay. Split up and agree to go in different directions. That way you avoid awkward moments of stumbling on someone doing their business and you spread out the fertilizer. Some more popular routes have outhouses at the trail heads. Other back country routes may have wood or plastic poop boxes called a Thunder Box. I can't remember the last time I have opened one of those where the crap wasn't oozing out the top so this information will come in handy.
2. Pick Your Area
- Away from Tents
- Away from Water
- Away from Trails
It is recommended to be at least 200 ft away from any of the above areas.
3. Dig a Hole
Use a trowel like the Sea to Summit Pocket Trowel or the GSI Cathole Trowel. If you don't want to fork out for those, just use a stick to dig a hole that is about 6" deep by 6" wide. The hole should be dug into soil and not just the top surface of duff or moss.
4. Take a Dump
5. Cover it Up
Use the trowel to cover up your shit and toilet paper with the material you originally removed. Tamp the material down lightly with your foot, returning the area to as natural looking state as possible. It's not likely you'll ever chance on the same spot again but you could leave a couple sticks placed on top in the shape of an X to help you and others avoid the area during your stay.
Things to Consider:
1. Toilet Paper
- Use biodegradable, non scented toilet paper
- No need to pack it out and don't burn it in the hole. Can you imagine burning the forest down after taking a dump? Not good.
- If you can find some sphagnum moss, you just might be lucky enough to feel like you have a bidet in the bush. Watch out for sticks and pine needles though, it can get a bit scratchy - ouch!
2. Bugs
My least favourite thing about shitting in the woods. Those mosquitos are like dive bombers and there is literally not much you can do to avoid a few bites in some awkward spots. Suck it up, fan your arms like crazy, I don't know...but I'm open to more ideas on that one.
3. Rain
Suck it up. When you gotta go, you gotta go
4. Birds and Wind
If you're not in a panic avoiding mosquitoes, take a minute to listen to the birds chirping and the wind rushing through the trees. Shitting in the bush can be so peaceful sometimes.
5. Hand sanitizer / Washing
I often bring small bottle of hand sanitizer with me or any brand of biodegradable camp soap can do the trick to get your hands clean before you head back to camp.
The Leave No Trace website has some further information on this topic along with a lot of other great things you should learn before heading into the back country.
Happy shit free hiking and camping!

Last Updated: November 18, 2020
Tuesday, September 10, 2019
Wetsuits vs Drysuits
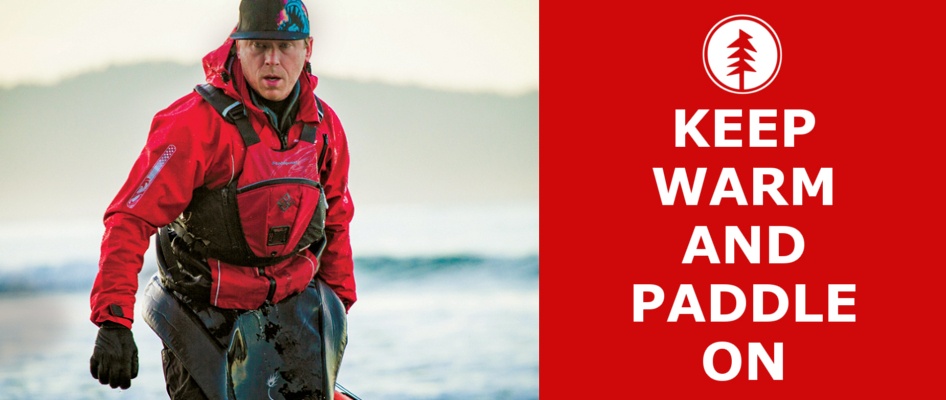
School has started, there's a chill in the morning air, and some of you I am sure are thinking about putting your boats away. This however would be a HUGE mistake; fall paddling can offer some of the best paddling. The big crowds are gone, but more importantly so are all those pesky bugs! Your biggest concern will be how to keep warm and comfortable through the dropping fall temperatures.
One of the most important principles for cold water paddling is to dress for immersion. We have two best friends when it comes to staying warm: wetsuits and drysuits.
WETSUITS
Wetsuits work by trapping a small amount of water between your body and the suit. In addition to the thickness of the suit, your body heat warms up the water and helps insulate you. The fit of the suit is extremely important in this respect. When too large, the suit will allow water to flow through, not retaining water, and not allowing you to warm it up. Your wetsuit should be snug while not restricting your movements.
While wetsuits excel when in the water, you will want to consider supplementing your suit with a paddling jacket to protect against wind and rain while you are paddling.
Wetsuits are the more economical option, and their durability is certainly an asset. Even with a small hole or tear in your suit it will still be very effective at keeping you warm.
vs
DRYSUITS
Drysuits excel in and out of the water, offering superior protection from the elements while paddling and reducing cold shock if you do actually go for a swim. Many paddlers will opt to wear their drysuit on a cool rainy day even though water temps do not actually call for immersion wear because they know they will be more comfortable.
As the name suggests this suit will keep you dry, it does not however insulate you from the cold water. Under your drysuit you need to add appropriate layers for the water temps. Drysuits also tend to be easier to put on, especially if your wetsuit didn't have time to dry out overnight.
If you want to paddle all year round, a drysuit is your best solution.
Conclusion
Given the right skills and clothing system you'll be able to paddle year round – assuming you're willing to search out open water. If you're not sure what you should be wearing, we encourage you to visit us and we can help you put together a cold weather clothing system that will keep you warm and paddling for as far into the 'off' season as you would like!
Thursday, January 10, 2019
The Bear Camp Site Facts
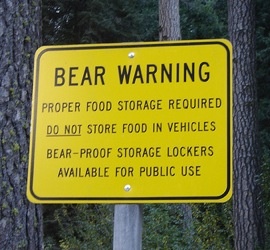 "...And then we sang at it until it went away"
So finishes the story of one proud--and lucky--paddler who found his group's campsite being raided by a bear. Looking to intimidate the animal, he and fellow paddlers stayed in a pack and sang "The Age of Aquarius" at the top of their voices until it moved on. No word on whether it was the volume or caliber of their singing that encouraged the bear to leave.
When you venture into the wilderness, you have to be prepared to find it a bit... well, wild. Encountering an animal or two when hiking or camping is usually no great issue for most wanderers, and can be the stuff of great photos and stories. However, certain types of animals can spell trouble, and outdoors enthusiasts should always proceed with caution and safety measures in place when away from civilization.
Keep A Clean Site
Most of us have heard the basics of bear safety before - pack out all garbage, clean up any food or other aromatic products, and keep food stored safely away from tents and off the ground. These are all important safety measures that should not be overlooked. In addition, as our savvy--if musically questionable--paddlers found, often noise is enough to keep bears at bay.
Noise
There are two main ways to use noise to deter an unwanted furry visitor: first, continuous noise can help remove bears from your path when you're out walking in the wilderness. Something as simple as a bell worn on your body can warn animals you are coming far before you see them. Most animals prefer not to come into contact with human beings, and will attempt to stay out of the way if they hear you coming. If this level of noise is insufficient or ineffective you can use a loud noise item (like a bear banger) to produce a higher decibel of sound and alert the animal to your presence.
Smokey's Conclusion
Smokey the Bear underwent a superhero-worthy reboot recently, with the new (tongue in cheek?) tag-line "Get Your Smokey On," so it feels like the perfect time to brush up with a refresher on how to stay safe around Smokey's wild, less anthropomorphic kin. Remember: bear attacks are rare, but the majority of attacks that do occur are defensive, and are a result of the animal being startled. Always make sure you announce your presence in the backcountry with lots of noise, and clean and pack away all food safely to minimize your site's interest. Seeing wildlife in its natural habitat is one of the most fulfilling aspects of getting away, but safety should always come first. You don't want to have to rely on a half-recalled version of "Sweet Caroline" to get you out of a jam.
Photo via ground.zero on Flickr