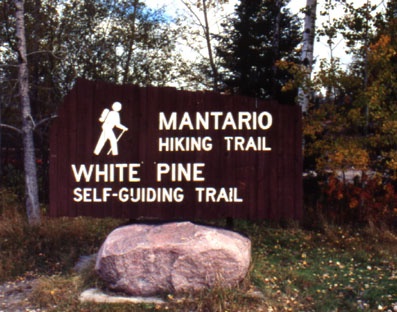
Mantario Trail Hiking Guide
All trip information is accurate to our knowledge at the time of posting, and provided for informational purposes only. Additions or suggestions can be directed to Wilderness Supply. All images and descriptions are the property of Wilderness Supply except where noted.
Trip Details
Type: Hike
Distance: 63km
Recommended Time: Manitoba Conservation recommends planning for approximately 25 hours of actual hiking time (not including breaks) to complete the trail. Most hikers spread this over at least 3-4 full days on trail.
Fees/Permits required: Both ends of the trail are located within the Whiteshell Provincial Park, and you will require a
parks pass for your vehicle.
Note: Users should always check for recent updates and changes to the trail as this information may change over time.
Due to the length and complexity of this hike we have elected not to include a Google map for this trail guide. All hikers should use a copy of the official Manitoba Conservation Mantario Hiking Trail map (available online and in stores) for planning and navigating their hike.
All distances and estimated hiking times are taken from the official Manitoba Conservation trail map.
Planning
The Mantario is a wilderness hiking trail, covering an extended distance and a wide range of terrain. It is recommended for experienced backpackers. If you are looking to build up your hiking experience before attempting the full trail, check some of the suggested hikes at the end of this guide.
The Mantario is a point-to-point trail that can be traveled either South to North or North to South. When choosing a direction you may want to consider the following:
- It is generally agreed that the up-and-down of the trail between the southern trailhead and Caribou Lake is one of the Mantario’s more challenging portions – the jury is out, however, as to whether it is therefore better to tackle this section at the beginning of your trip, when your legs are fresh, or the end when your pack is lighter.
- The official trail map provides basic descriptions of each trail section traveling in the South-to-North direction. Hikers moving the opposite way will need to mentally reverse these descriptions while traveling.
Car Shuttles
Since the trail travels in one direction you will have to make arrangements to be picked up or collect your vehicle when you finish your hike. There are no known shuttle services available for the trail – popular options include:
- If you are hiking in a group with multiple cars, drop one car at one end of the trail and drive together in the second vehicle to the other end of the trail. After hiking, drive back to collect the second vehicle.
- Some hikers leave a bike chained up at one end of the trail and drive to the other, cycling back to pick up their car after hiking. If choosing this option note that the road distance between trailheads is approximately 66km.
- Arrange for a friend to drop you off and pick you up - or at least pick you up at the end of the trail and drive you back to your car. Note that there is currently no cell reception at either trailhead, so you will need to make plans in advance regarding pickup times.
- 'Keyswaps' can sometimes be arranged with other hikers tackling the trail – both drivers exchange spare keys and hike in opposite directions, using the other hiker’s car when reaching the end of the route. The Mantario facebook group is a good place to try and arrange these trades – though we always suggest meeting beforehand and checking for valid driver’s licenses before arranging a swap.
Packing
Not sure what to pack? Check out our sample Multi Day Hike Packing List, which is based on staff packing lists from the Mantario trail.
Note that this route is challenging and requires proper gear and footwear. Many hikers have had to turn back or even call for emergency removal from the trail due to turning an ankle. Proper hiking boots are recommended. The trail should not be attempted in runners or other shoes with minimal support.
Cell reception is still very patchy along this route, and non-existant for long sections. Phones should not be relied upon for navigation or emergency contact. We suggest taking a SPOT unit (which is also available for rent) in case of emergencies. We have known several experienced hikers who have had to use a SPOT unit to call for help on the trail due to injury or other unforeseen difficulties.
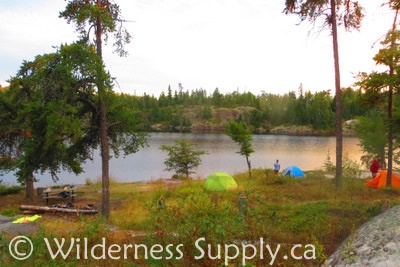
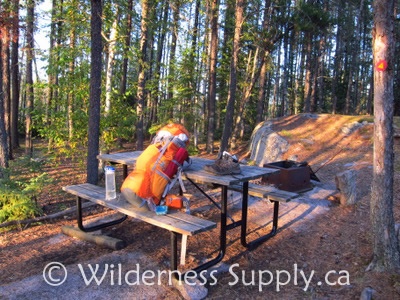
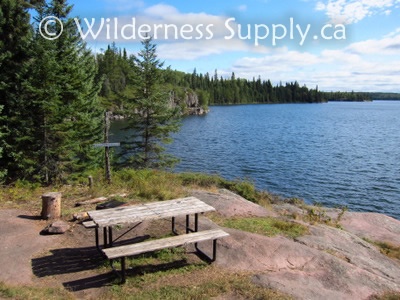
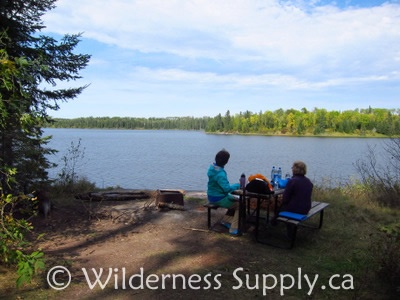
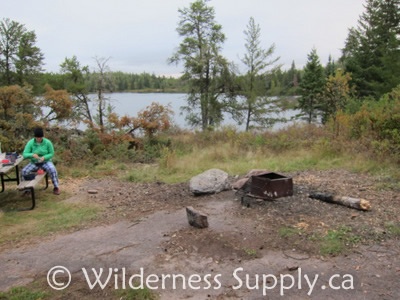
Campsites
There are 10 official campsites along the length of the trail. Each features a picnic table, a fire box, a bear box for overnight food storage and a basic toilet. The bear box and toilet will be located some distance from the rest of the site (usually the bear box first, and the toilet further down the same route). It's best to search around and locate these when first arriving at a campsite rather than waiting until after dark!
The campsites are not maintained and there is no garbage disposal allowed in the bear box, toilet or other areas. You must carry out all garbage you bring in with you while hiking. If you burn cans or other items remove them from the fire pit in the morning when they have cooled and carry them out with the rest of your garbage.
For more information on garbage disposal while hiking check out our Leave No Trace Camping article.
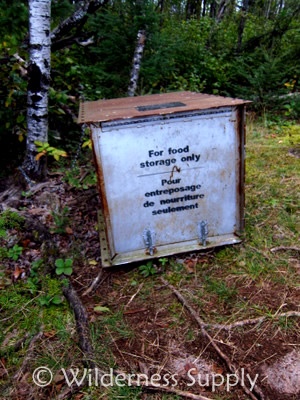
Bear box
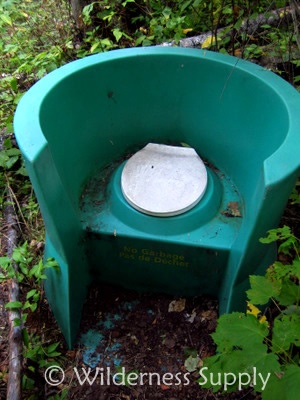
Drop toilet
Weather
September is generally considered the best time to hike the trail due to lower water levels, cooler temperatures and less bugs. If hiking later into the fall, be aware of fading daylight. Check what time the sun will set during your hike and plan your days to allow ample time to reach your campsite before sunset, at which point most sections of the trail become very dark and difficult to navigate.
Navigating
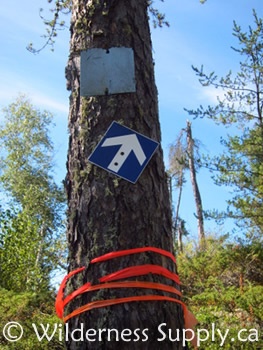
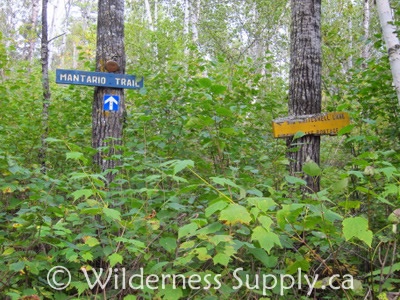
All hikers should carry the official trail map and a compass, and be familiar with how to read them. A combination of markers show the route along the trail:
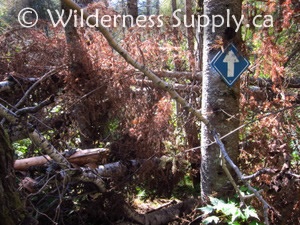
- Official trail signs (white arrows on a blue background)
- Rock cairns (especially along wide open sections)
- Blue flagging tape
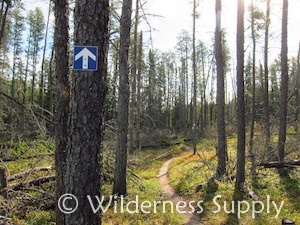
Official trail signs

Rock cairns
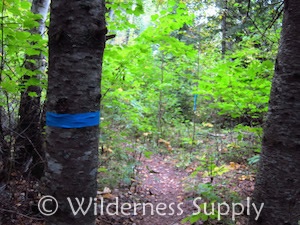
Blue flagging tape
Though the trail is in a constant state of change and upkeep, for the most part it is well signed and you should never travel more than a few minutes without seeing some form of marker. If you do, stop, look around, and if necessary retrace your steps to your last marker to re-scan for the correct route.
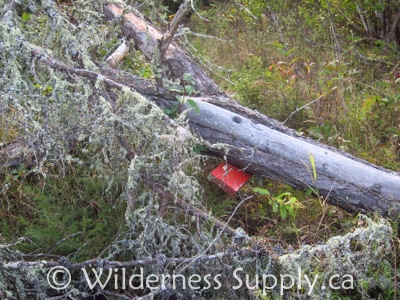
Many of the trail signs are attached to trees, which do occasionally fall down. From time to time some mental twisting may be required to determine which direction the sign was pointing before the tree came down.
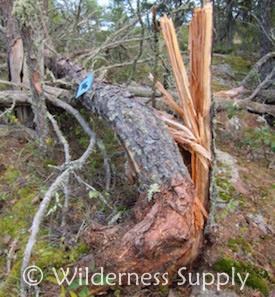
Downed trail sign
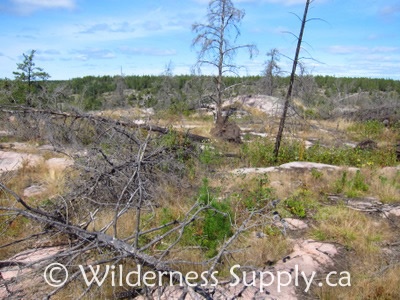
Sometimes these downed trees or other debris may make the official trail difficult to follow. Volunteer groups work hard to clear particlarly bad sections of the trail on a yearly basis - you can help by moving any small obstacles and trying to stick to the official trail whenever possible to minimize erosion and misleading side trails.
A blown down section
Getting There
The South Trailhead
South Trailhead on Google Maps
The south trailhead parking lot is approximately 2 hours from Winnipeg. Take Hwy 1 east towards Kenora. About 140km out of Winnipeg take the Hwy 44 turnoff to West Hawk Lake. Turn left at the stop sign to continue on Hwy 44, then right onto Hwy 312. After about 3km the parking lot is on the left – it comes up fast, so watch carefully.
South Trailhead parking lot sign - photo via Nature Manitoba
The North Trailhead
North Trailhead on Google Maps
The north trailhead is approximately 2:15 hours from Winnipeg. Take Hwy 59 northeast out of the city. Just past Birds Hill Park take Hwy 44 east towards Beausejour. After 26 km turn right to stay on Hwy 44, then left to stay on Hwy 44 (signs for West Hawk Lake). After 30 km, turn left to take Hwy 11 north towards Lac Du Bonnet. After 5 km, turn right onto Hwy 307 E. After 55 km, turn left onto Hwy 309 E (signs for Whiteshell Lake). Continue on Hwy 309 up through the town of Big Whiteshell as it becomes ER 45. The road dead-ends at the north trailhead, some distance past a small parking lot.
In Between Trailheads
It takes just over an hour to drive between trailheads. From South to North: Exit the trail parking lot and turn right to head west on Hwy 312. At the junction turn right on Hwy 44 W. Turn right on Hwy 307 N and then right again onto Hwy 309 E (signs for Whiteshell Lake). Continue on Hwy 309 up through the town of Big Whiteshell. The road dead-ends at the north trailhead some distance past a small parking lot. To travel north to south, reverse the directions.
The Route
South Trailhead to Caribou Junction
Distance: 7.2km. Official estimated hiking time: 3 hrs.
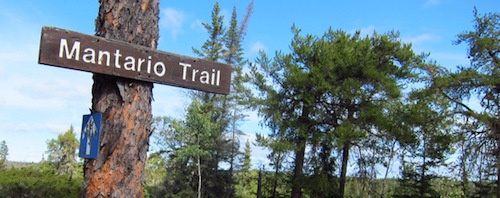
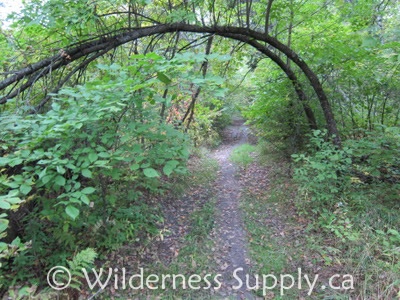
The trailhead parking lot has basic toilets and a water pump – make use of both before you get hiking! The trail begins behind the Mantario Trail sign and follows an old logging road for a few hundred meters before turning right to head north. This section of the trail features a number of climbs and descents over steep terrain. Watch your footing and don’t get discouraged – this is one of the most challenging sections of the route.
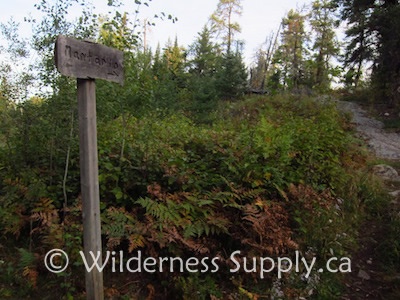
A wooden sign marks the turn north after following the old logging road from the parking lot
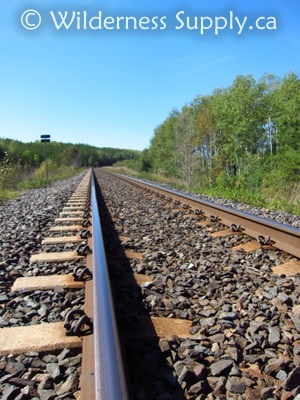
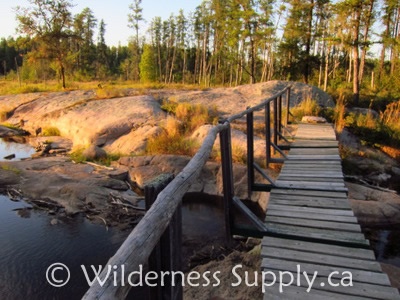
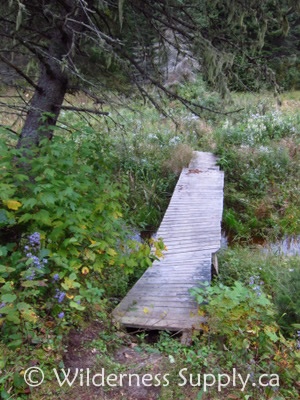
There is a footbridge over the Whiteshell River, and basic log bridges over some other creeks and wet sections. The trail crosses two different sets of railway tracks a short distance apart. Both are in use, so watch out for trains. At the second set the trail follows the tracks west for a short distance before continuing north.
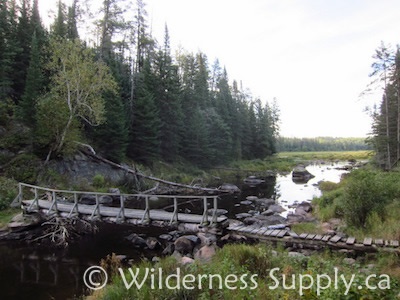
Whiteshell River footbridge
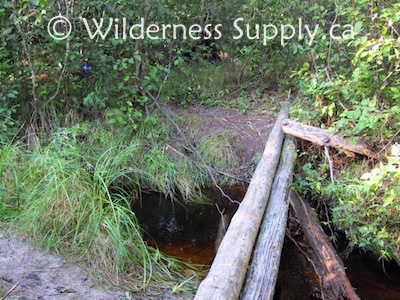
One of many basic log bridges
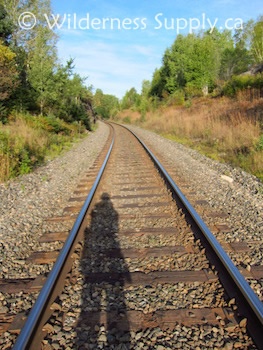
Railway line #1
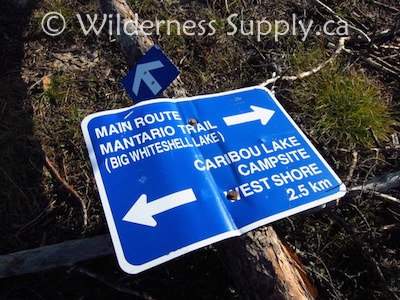
The Caribou junction is marked with a large metal sign, currently blown over but still visible. Four foundation blocks mark the base of an old airfield tower. Day and overnight hikers can head either east or west, towards the two Caribou Lake campsites. Through hikers should head east towards the Caribou East campsite and the rest of the trail.
Caribou Junction to Caribou East Campsite
Distance: 5.1km. Official estimated hiking time: 1 hr 45 mins
From the Caribou junction the through trail heads east (right) and continues through a section surrounded by dead and wind-blown trees. Just after the trail turns north around the edge of Caribou Lake there is a steep scramble down to cross a creek and back up - watch your footing and take your time on the rocks.
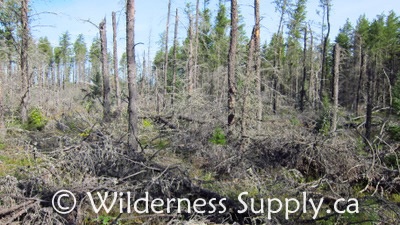
Windblown section of the trail
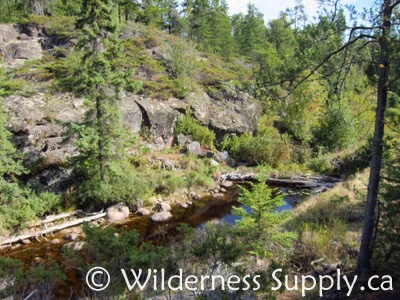
Coming up on the creek crossing with a rock scramble on the opposite side
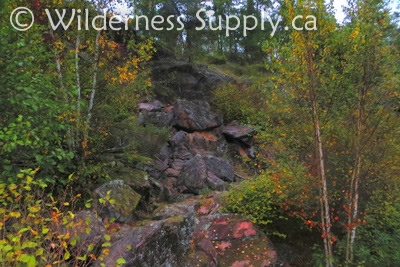
Rock scramble
The trail skirts along the boarder of Caribou lake and a heavily flagged tree marks the turnoff point to the Caribou East campsite (Turn left at the tree and follow the trail for approximately 150 meters. You will see the bear box before you reach the campsite).
Turnoff for the Caribou East campsite - head left to the campsite, or right to continue on the trail
Caribou East campsite
From Caribou East to Marion Lake
Distance: 6.5km. Official estimated hiking time: 2.5 hrs.
The trail heads north over fairly easy terrain and eventually passes a survey marker set into the granite.
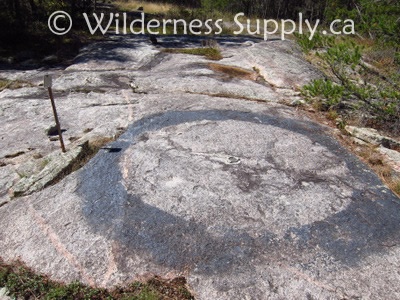
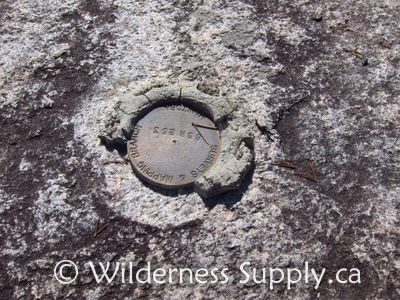
Survey marker
Shortly after the marker the trail crosses a final set of train tracks. The continuation of the route is currently only marked by a small bit of orange flagging tape, and you will have to walk for a short distance down the trail before seeing your first official trail marker. The trail continues through a slightly overgrown section before following the Marion/Ann Lakes portage trail east for 50 meters and then heading north to Marion Lake.
Train tracks
Marion Lake campsite
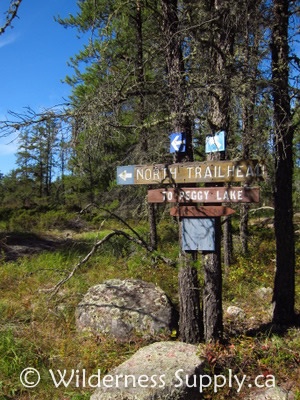
Marion Lake to Peggy Lake
Distance: 7.7km. Official estimated hiking time: 3 hrs.
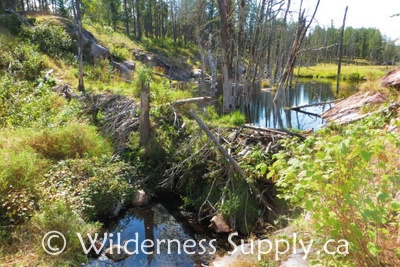
After leaving Marion Lake the trail crosses a beaver dam and continues through an area that currently has many downed trees across the path. A little scrambling may be required. The trail joins the Doreen/Peggy Lakes portage route heading north and opens onto a clear section with power lines running east to west.
Beaver Dam Crossing
Transmission Lines
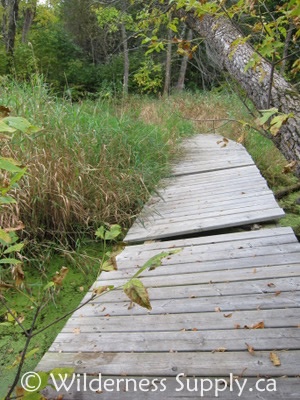
Past the power lines the trail continues with the portage route for another 300 meters before turning west (left). This section is boggy and features several makeshift bridges and walkways. Step carefully and do your best to avoid getting your feet wet. The trail crosses another portage route between Doreen and Peggy lakes and finally descends into a wet crossing leading to Peggy Lake. Large rocks form slightly precarious stepping stones to cross the water and reach the campsite.
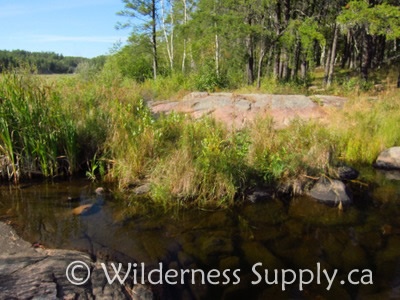
Wet crossing - the stepping stones are just to the left of this photo
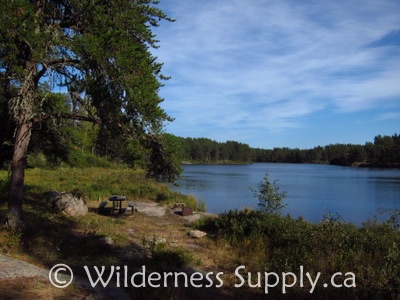
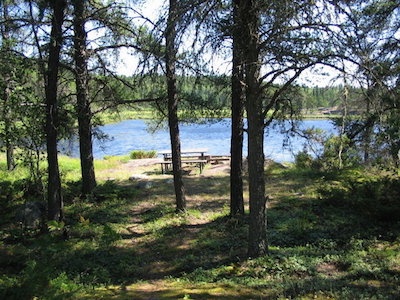
Peggy Lake Campsite
Peggy Lake to Moosehead Lake
Distance: 6.3km. Official estimated hiking time: 2 hr 15 mins.
The next stretch of the trail features three campsites, making it a great place to plan a day-end so you can stop at whichever suits you best. Just 1.5 km past Peggy lake the Alice Lake campsite is to the east (right) of the trail.
Alice Lake Campsite. Photo via Pemmican Trails
Past Alice lake the trail continues through a boggy section - stick to the makeshift log bridges and steps wherever possible, and try to keep your feet dry. Heading down into Olive lake there is a steep descent - watch your feet and go carefully. Cross the wooden bridge into the campsite.
Bridge leading to Olive lake
Olive Lake Campsite
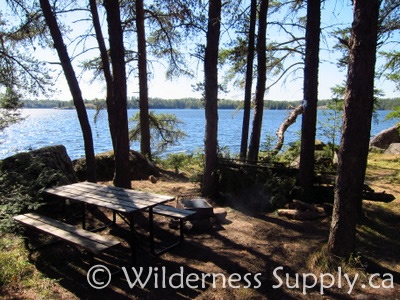
Just a short walk beyond Olive Lake is the large Moosehead Lake campsite, featuring a wooden box with a trail log you can sign (or read, if you're bored), several picnic tables and plenty of space for multiple groups. You've made it to the halfway point of the trail!
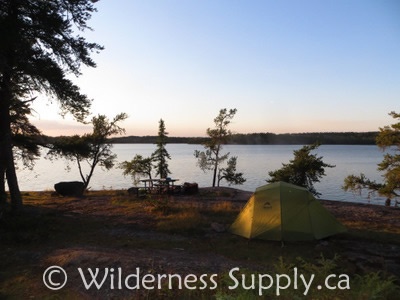
Moosehead Lake Campsite
Moosehead Lake to Mantario Lake
Distance: 8km. Official estimated hiking time: 3 hrs 20 mins.
The next section of the trail is one of the most challenging, and it's best to tackle on fresh legs if your schedule allows. Follow the trail along the shore of Moosehead Lake - you may need to detour from the official path slightly depending on water levels. Keep your eyes on the official blue Mantario signs as there are a few other routes in the area. After leaving the lake the trail climbs and a short extra walk up to the highest point on the hill provides a great viewpoint - though not quite a stunning as the official "view" coming later on.
Viewpoint
About half way to the Mantario Lake campsite an easy-to-overlook trail leads off to the Nature Manitoba Mantario Cabin. This cabin is sometimes available for Nature Manitoba members to rent, but it is not a stopping point for hikers - continue north along the main trail.
The trail passes through several climbs and descents before crossing the Hop/Mantario Lake portage. If you need water it's only a short walk east (right) to the shores of Mantario Lake to refill - if not, keep heading north. Several more steep climbs and descents lie between you and the official Mantario Lake campsite.
Mantario Lake campsite
Mantario Lake to Ritchey Lake Turnoff
Distance: 7.1km. Official estimated hiking time: 3 hr 50 min.
Stock up on water before leaving the campsite - the trail does not have direct access for the next 13 km until reaching Hemmingway Lake. If you run out (or don't want to carry more than necessary) take the turnoff to the Ritchey Lake campsite to refill your bottles - however be aware that a round trip to and from this pretty little campsite will add nearly a kilometre to your total hike.
Coming out of Mantario Lake you will pass through a burnt out section on a high ridge, just now starting to grow back after a fire a number of years ago. The next few kilometres of the trail twist and turn, at times travelling due south through a number of climbs and descents - keep your eyes on the trail markings to avoid getting turned around. A steep scramble leads down to a large beaver dam crossing.
Burnt out ridge

Steep scrambles
Beaver Dam crossing
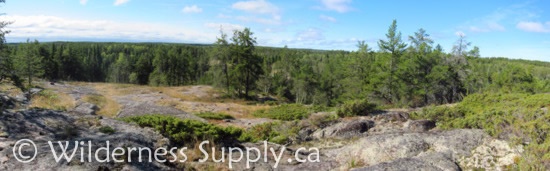
After the dam a climb leads to the best viewpoint on the trail. After taking a break to appreciate the view continue north through undulating climbs and descents until reaching the well-marked turnoff to Ritchey Lake. If you are heading east (right) to Ritchey note that the turnoff trail is less well marked than the main route (especially on the way back) so keep your eye out for the few existing trail markers.
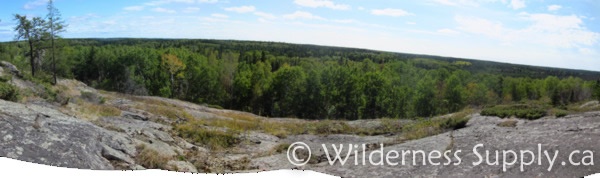
"The View"
Ritchey Lake Campsite
Ritchey Lake to Hemenway Lake
Distance: 6km. Official estimated hiking time: 2 hr 20 min.
The trail heads north through some relatively gentle climbs and descents for several kilometres before crossing the Big Whiteshell/Ritchey Lakes portage. Continue on past the Big Whiteshell/Crowduck Lakes portage.
Big Whiteshell / Ritchey Lake Portage
You will climb to a small ridge overlooking Hemenway Lake - note that the tree holding the "Hemenway Lake" sign has blown down - the path continues behind it down to the campsite.
Hemenway Lake Sign
Hemenway Lake campsite
Hemenway Lake to the North Trailhead
Distance: 9.1km. Official estimated hiking time: 3 hr 30 min.
The trail heads west out of Hemenway Lake to the shore of Big Whiteshell. There are many opportunities to fill your water along the shore of the lake, and several unofficial campsite spots popular with boaters. Depending on water levels the trail may be wet in sections as it hugs the shore of the lake. A wooden bridge spans one of the creek crossings.

On the shore of Big Whiteshell
Wooden bridge
Continuing around the border of the lake you will pass a rusted out old car just before reaching a gravel road at Crowduck Lodge. Follow the road east (right) to just past the fork before turning north again (left) along the trail.

Abandoned car
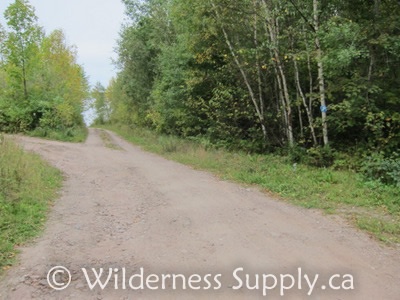
Crowduck Lodge Road
The next section of the trail follows a wide, abandoned mud road. Though not very picturesque, navigation in this section is extremely easy - which is why you will see less trail markers than anywhere else on the route. The path can get muddy in this stretch, so do your best to keep your feet clear.
Abandoned mud road
Cross one more wooden bridge along the way and the road will bring you out at the north trailhead.
Wooden bridge
Congratulations on finishing Manitoba's longest hiking trail!
Important Notes
- Always leave a detailed trip plan and estimated time of return with someone at home before embarking on any trip.
- All route information and photos were accurate at time of collection (September, 2015) but the trail is in a constant state of change. Campsites and routes may appear different from how they are pictured and described.
- If you have questions about this or any other trips, please visit your nearest Wilderness Supply store, where our staff will be happy to provide advice and suggestions!
Suggested Hikes
If you are thinking of tackling the Mantario trail but would like to work your way up to a full through hike, there are shorter hikes in the area with similar terrain that can help you acclimatize and test your gear. You can also consider hiking from either trailhead one or two campsites in and back out - this option solves any car shuttle difficulties!
Routes we recommend:
- Hunt Lake Trail
- Mantario: south trailhead to Caribou or Marion Lake, then back out over one or two nights.
- Mantario: north trailhead to Hemenway or Ritchey Lake and back out over one or two nights.